
Why PET Bottle Wall Thickness Varies in Production and How to Fix It
When a PET bottle looks fine in a short trial but starts drifting in production, wall thickness is often the first thing that gives the game away. The painful part is not the number itself. It is the domino effect: scrap spikes, burst failures show up in random places, and operators start chasing settings that worked “yesterday.” If you make blow molded bottles, this problem usually has a pattern. It is rarely a mystery, and it is almost never solved by one quick tweak.
What Uneven Wall Thickness Really Looks Like in Stretch Blow Molding
Uneven wall thickness is not one single defect. It shows up in specific ways, and each way hints at a different root cause. You might see a base that goes thin while the body stays normal. You might see a heavy shoulder that refuses to stretch. You might see one cavity drifting while the others behave. And sometimes the worst cases are sneaky: bottle weight stays on target, but thickness distribution moves, so performance drops later.
In blow molded bottles, uneven wall thickness often appears at the base or shoulder first, even when the overall bottle weight still meets the target. If your team can name the pattern before touching settings, troubleshooting gets faster and a lot less emotional.
How Material Flow Creates Wall Thickness Variation
Wall thickness variation is basically a material flow story. PET does not “decide” thickness randomly. Once the preform heats, the hot and cool zones stretch differently. Then the stretch rod and air profile guide where material goes. Finally, mold contact and cooling lock the result. If one stage drifts, the final wall thickness shifts with it.
The wall thickness patterns seen in blow molded bottles are the direct result of how heated material flows during stretching and blowing, not a random defect. This is why you can see the same defect shape repeat day after day, even after multiple “fixes.” The process is repeating the same mistake.
Heating-Related Causes That Distort Material Distribution
Heating sets the playing field. If the preform temperature map is off, everything downstream is forced to compensate, and it rarely compensates evenly. Before chasing stretch or blowing changes, check whether the preform is entering the mold with the same heat profile across time, cavities, and ambient conditions.
Uneven Preform Heating Zones
Uneven axial heating can create a thick shoulder and thin body, or the reverse. Circumferential heating imbalance can create a “thin band” that keeps showing up in the same clock position. This often happens when lamps age, reflectors get dirty, airflow changes, or preforms arrive with inconsistent storage temperature.
A practical move is to pick a small set of thickness checkpoints, then tie them to heating zone adjustments in a controlled way. If five things change at once, the data becomes noise.
Axial vs Circumferential Temperature Imbalance
Axial imbalance is “top to bottom.” Circumferential imbalance is “around the ring.” They look different in thickness data, and they respond to different fixes. If the shoulder is always heavy and the base keeps thinning, axial balance is likely off. If one side of the bottle keeps going thin while the opposite side stays thick, suspect circumferential imbalance, preform rotation issues, or airflow effects in the oven.
Stretching and Blowing Actions That Amplify Small Errors
Stretching and blowing are where small heat issues get magnified. A minor temperature shift can turn into a major thickness deviation if the mechanical action is not consistent. This is also where “same settings” can lie. You can keep the numbers unchanged and still get a different result if timing drifts or motion differs between cavities.
Stretch Rod Timing and Alignment
If stretch rod timing is late, material may not distribute into the base as intended. If alignment is off, one side can stretch more than the other, leading to circumferential thickness variation. In multi-cavity systems, small mechanical differences add up. One cavity can become the troublemaker, and it drags your whole quality story down.
When the base is thin but the body looks normal, stretch rod behavior is a prime suspect. A quick check is whether the “thin base” is consistent across cavities or isolated. Consistent across cavities points to process or heating. Isolated points to mechanical or tooling differences.
Air Pressure Profile and Ramp Speed
Pressure is not just “high or low.” The ramp, timing, and stability matter. If the pressure ramp hits too hard, you can push material out of key regions before stretch completes. If pressure supply fluctuates, thickness can drift over a long run even when nothing else changes.
This is where supplier choice matters, because stable production is more than mold delivery. If you are mapping capability and support, this guide on how to choose a blow mould supplier helps you line up what to ask for when wall thickness consistency is a real requirement.
Mold and Cooling Constraints That Lock In Thickness Errors
Mold and cooling do not “create” every thickness issue, but they can lock it in and make it repeatable. Cooling imbalance can also create false signals. A bottle may look like it has thickness variation when it is actually shrinking unevenly due to temperature differences.
Cooling Imbalance Across Cavities
Uneven cooling can cause cavity-to-cavity drift, especially during long runs. One cavity runs slightly warmer, so the bottle behaves differently at ejection, then it changes shape during cooling, then your thickness readings look inconsistent. This is why thickness checks should be paired with a stable sampling routine and consistent bottle conditioning time.
If one cavity keeps failing drop tests while the others pass, do not only chase thickness numbers. Check cooling flow balance and mold temperature stability.
Mold Temperature Stability Over Long Runs
Temperature stability is the quiet killer. During the first hour, the system may behave. After heat soak, the balance shifts. If your line “gets worse after lunch,” that is not a joke. It is a clue. Mold temperature drift can change how material freezes, which changes thickness distribution and final performance.
Why Fixing One Parameter at a Time Often Makes Things Worse
A common trap is treating wall thickness variation like a single knob problem. One change improves one measurement point but damages another. Then a second change “fixes” the damage but breaks the original area again. Soon the line runs on tribal knowledge, and every shift has its own recipe.
This is why a structured approach matters. If you want a clearer control framework that connects checks, control points, and line-level stability, link your troubleshooting back to PET bottle wall thickness measurement and control. It keeps the team aligned on what the numbers mean and what they do not mean.
A Practical Order for Troubleshooting Wall Thickness Variation
A clean troubleshooting order saves time and avoids false wins.
Start with heating stability. Confirm preform temperature behavior is repeatable across time and cavities. If heating drifts, everything downstream becomes reactive.
Next, check stretch action consistency. Look at timing, alignment, and repeatability. If one cavity is off, isolate it early instead of averaging the problem away.
Then review the air supply and pressure profile. Stability matters more than peak numbers. Watch for drift over long runs and shift changes.
Finally, validate mold temperature and cooling balance. If the mold runs unevenly, your “fixed” process will not stay fixed.
This order is boring, and that is the point. Boring troubleshooting usually works.
Why Line-Level Coordination Reduces Repeat Problems
For blow molded bottles, uneven wall thickness increases the risk of paneling, base instability, and early failure during filling and transport. If the same defect keeps returning, the problem is often not a single setting. It is coordination. Heating, motion, air, cooling, and automation timing must act like one system.
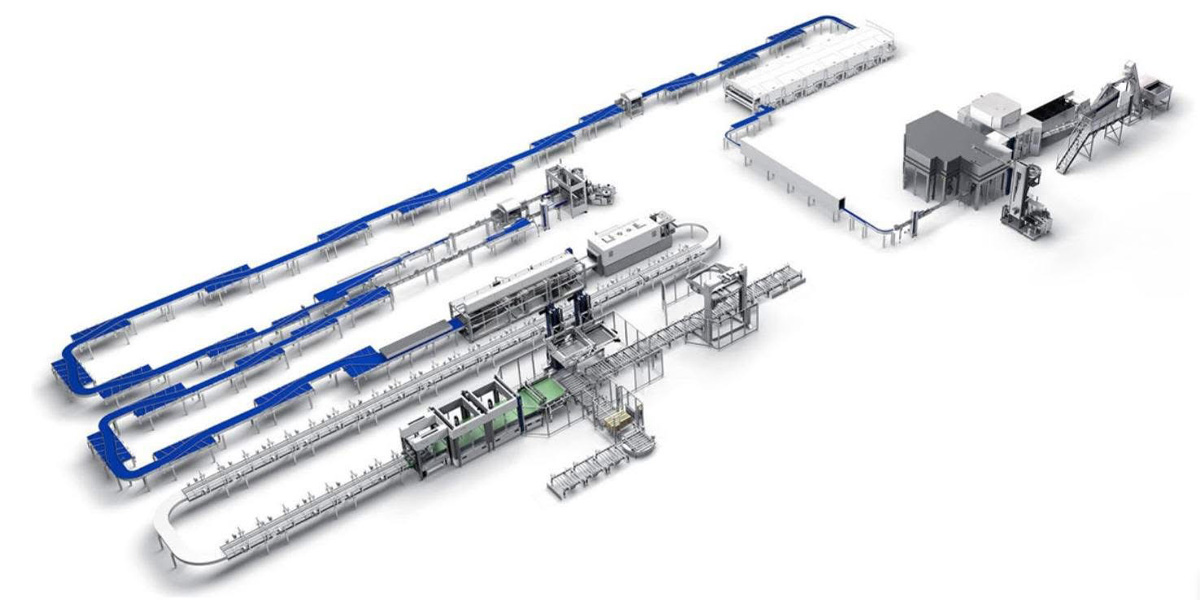
That is exactly where a line-level approach pays off. A complete blowing system supporting scheme helps you treat wall thickness as a whole-line result, not a repeating firefight. When the line is designed and supported as a system, you spend less time “tuning” and more time producing stable bottles that stay stable.
Conclusion
Wall thickness variation in PET bottles is usually predictable once you look at the flow story: heat map, stretch action, air profile, and cooling lock-in. Quick fixes can hide the issue for an hour, then it comes back louder. A better path is a practical troubleshooting order and a line-level mindset. Measurement tells you what happened. Process coordination decides whether it happens again.
A Precision Partner for PET Bottle Projects That Need Stability
HEYAN TECHNOLOGY (Foshan Heyan Precision Mold Technology Co., Ltd.) supports PET packaging projects where repeatability matters as much as speed. You get precision tooling for preform molds, bottle blowing molds, and cap molds, plus engineering support that targets production reality: stable cycles, consistent quality, and fewer trial loops. For teams that want more than a mold handoff, HEYAN TECHNOLOGY also supports line-level thinking, so heating, stretching, blowing, and cooling work together instead of fighting each other. If your goal is consistent bottles across shifts and long runs, this kind of practical, system-minded support is what turns a “good trial” into steady mass production.
FAQ
Q1: Why does wall thickness look fine in trials but drift in production?
A: Trials are short and forgiving. Production adds heat soak, small timing drift, air supply variation, and cooling changes over time. Those effects stack up.
Q2: What is the fastest way to spot the root cause of uneven wall thickness?
A: Name the pattern first. Thin base, heavy shoulder, one cavity drifting, or circumferential imbalance each points you toward a different check order.
Q3: Should you change heating or blowing settings first?
A: Start with heating stability. If the preform temperature map is moving, blowing changes become guesswork and you end up chasing your tail.
Q4: Why does fixing one measurement point sometimes make another point worse?
A: Material has to go somewhere. A change that pushes more material into the base may steal it from the shoulder, especially if stretch action and pressure timing are not aligned.
Q5: When should you stop tuning and consider a line-level solution?
A: When the same defect returns after “successful” adjustments, or when results change by shift and long run time. That is usually a coordination problem, not a single setting problem.