
How to Choose the Right Cavity Number in PET Preform Moulds
TL;DR: Use a simple capacity formula first, then “gate” the result with cooling limits and SKU change frequency. Validate with a short pilot, watching ∆T, neck dimensions, weight, and cycle stability.
You care about output, stable quality, and a payback you can show on a slide. Cavity count sits right in the middle of those goals. Pick too low and you leave throughput on the table. Pick too high and changeovers slow down, cooling falls behind, or scrap creeps up. This guide gives you a simple way to size the cavity number preform mould decision, check the utilities behind it, and avoid surprises when production ramps.
Why Does Cavity Count Matter?
Before talking numbers, anchor the reason. Cavity count decides how fast a line can run at a given cycle, how tricky maintenance becomes, and how forgiving the process is when the day gets messy. A clean choice shortens launch time and keeps buyers off your back later.
Throughput And Cycle Math
Use a plain formula most teams adopt for cycle time calculation for preform mould:
Hourly Output = Cavities × 3600 ÷ Cycle Time (s).
Do not forget real life: first-off checks, last-off checks, and short stoppages. A 72 cavity preform mould at 36 s does not give 7200 pcs/h in practice. Plan for 85–92% of the paper number as a quick sanity check.
Quality And Consistency
More cavities mean more chances for tiny imbalances. Runner balance, core alignment, and gate temperature control have less room for error. If neck roundness or gate blush drifts, complaints show up fast. That is fine if metrology and PM habits are in place.
Changeover And SKU Mix
If you change neck finishes often, mid-cavity tools can beat a max-cavity layout. Tooling that changes fast keeps overall equipment effectiveness steady. It is not glamorous, but it saves hours each week. For layout examples and related tooling families, browse the Product Center to see how families scale.
What Inputs Do You Need Before Sizing?
Jumping to a number without inputs is guesswork. Take one pass through the machine, the utilities, and the SKU plan. It takes an hour and saves weeks.
Machine And Shot Capacity
Confirm clamp tonnage, screw plasticizing rate, and shot volume against your target preform weight and the planned cavities. The shot should sit in the efficient zone of the barrel, not near the limits. If backpressure spikes or cushion fades, you sized too aggressively.
Cooling: Chiller Flow And Delta T For Mould Cooling
Cooling sets the real cycle. Check chiller tonnage, per-circuit flow, and chiller flow and delta T for mould cooling requirements on the tool drawing. A simple rule: if ∆T between inlet and outlet rises over time at the same cycle, scaling or flow limits are building up. Split circuits, spiral baffles near hot zones, and clean water help more than any fancy tweak.
SKU Count, Neck Finishes, And People
Frequent neck swaps? Consider modular neck stacks and mid-cavity tools. Stable SKUs? Higher cavitation makes sense. Also ask who will run PM and metrology. A larger tool needs a steady routine to stay predictable.
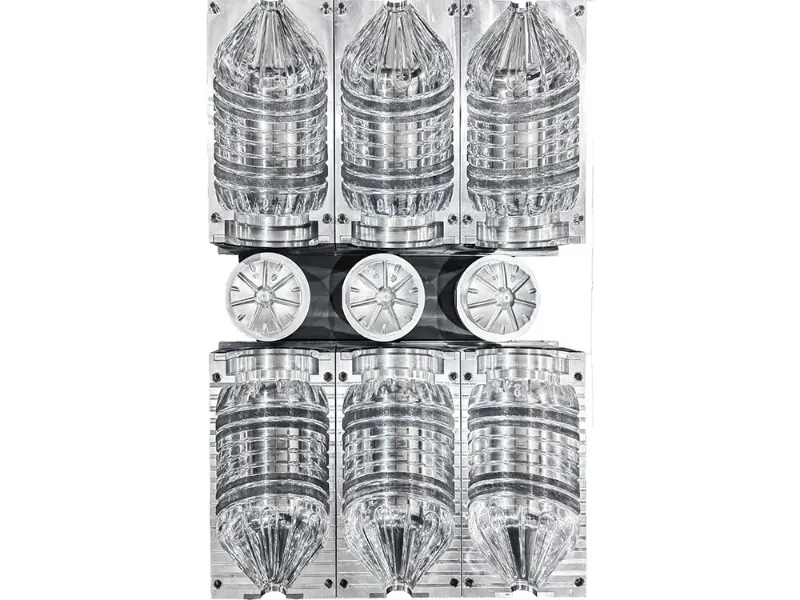
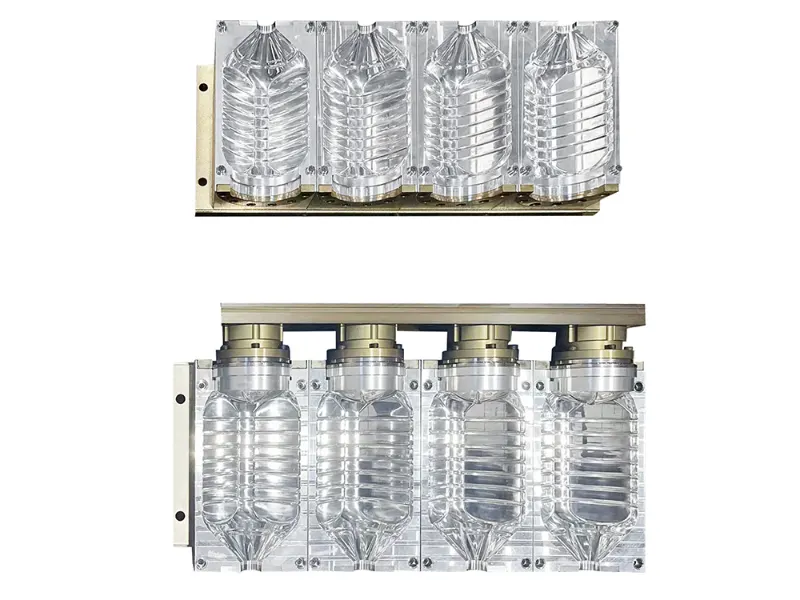
How Do 24, 48, And 72 Cavities Compare?
It helps to see the jump points. You can add more, like 96, but these three cover most bottle programs.
24 Cavities — Trial, Pilot, And Multi-SKU Labs
Good for pilots, frequent changeovers, and early shelf launches. Cooling and handling are straightforward. The tradeoff is unit cost at volume. If demand spikes, capacity gets tight fast.
48 Cavities — Balanced Daily Volume
This is a common sweet spot. Enough output for steady orders, but still friendly to changeovers and maintenance. Utilities are reasonable. A solid path for mixed SKUs and mid-size teams.
72 Cavities — High Volume With Stable SKUs
A 72 cavity preform mould shines when demand is stable and neck finishes do not change every week. Cycle consistency matters more. Put budget into metrology, spare hot runner parts, and cooling quality to protect uptime.
Quick View (Indicative Only)
| Cavities | Typical Use | Changeover Difficulty | Utility Load | Notes |
|---|---|---|---|---|
| 24 | Trial / multi-SKU | Low | Low–Medium | Flexible, lower capex |
| 48 | Daily volume | Medium | Medium | Balanced for most plants |
| 72 | High volume | Higher | Medium–High | Needs tighter controls |
When Should You Choose A 72 Cavity Preform Mould?
There is no magic number. These flags say you are in 72-cavity territory.
Stable Forecast And Few Variants
If demand forecasts are steady and neck finishes are limited, higher cavitation pays back. You can plan PM around real runs, not constant changeovers.
Utilities Are Ready
Cooling is the gatekeeper. Pressure and flow must reach every circuit. If the chiller is already near its limit, fix that first. Keep an eye on ∆T and pressure drop data. A small flow meter and a log sheet look boring but save the day.
Quality Risks Are Measured
High cavitation amplifies small drifts. Build a routine around neck dimensions, gate vestige, weight, and cycle time. If the numbers move, act before the shift ends.
How Do You Validate The Choice Before Purchase?
A short test plan saves long emails later. Your process engineer will thank you.
Pilot Run And Acceptance Criteria
Define the acceptance window first: neck roundness, thread gauge, gate mark, weight window, haze score, and a stable cycle over a fixed shot count. Run at least three cycles of tests: first-off, mid-run, last-off.
ROI And TCO In One Page
Simple math works. Compare annual output gain against scrap, energy, spare parts, and planned PM. Put changeover time into that sheet if you run many SKUs.
Who Can Help Engineer The Choice?
Picking the right number is half sizing, half follow-through. A partner that speaks in cycle, ∆T, and maintenance windows makes a difference.
About Foshan Heyan Precision Mold Technology Co., Ltd.
Foshan Heyan Precision Mold Technology Co., Ltd. focuses on PET packaging tooling with a shop-floor mindset. The team pays attention to neck accuracy, balanced runner layouts, and cooling circuits that reach hot spots without starving flow elsewhere. On the commercial side, product families cover preform, blow, and closure tooling, so your program can scale rather than restart. What customers usually point out is the mix of clean documentation and practical support: material traceability, heat-treat data, QC sheets, and clear acceptance steps that align with your metrology. Short change-part lead times help when SKUs stack up. If a full cell is in scope, you can map auxiliaries and handling with the same contact.
FAQ
Q1: How do you start a cycle time calculation for preform mould when data is thin?
A: Use recent cycles from a similar neck and weight, then run a short DOE on melt, injection speed, hold, and cooling. Apply an 8–15% loss factor for checks and small stops.
Q2: What pushes a plant toward a 72 cavity preform mould instead of 48?
A: Stable SKUs, reliable cooling capacity, and a forecast that justifies higher cavitation. If changeovers are rare, the higher tool pays back faster.
Q3: Which utility numbers matter most for cooling?
A: Per-circuit flow and chiller flow and delta T for mould cooling. Rising ∆T at the same cycle hints at scaling or flow limits. Keep pressure drop in a healthy window.
Q4: How do you choose cavity count when SKUs change often?
A: Favor mid-cavity with fast neck stacks and clean change procedures. The saved hours per swap usually beat the theoretical gain of a max-cavity tool that sits idle.
Q5: What is a simple way to keep the tool stable week to week?
A: Track four items: cycle time, clamping tonnage, neck key dimensions, and gate vestige. If any metric drifts past the band you set, clean, align, or descale before the next run.