

PET Bottle Top Load Testing: How to Set Acceptance Criteria
In terms of design approval PET bottle top load testing is useful if bottle condition, test method and acceptance criteria are defined before comparing force values. A higher force value does not necessarily mean better performance in filling, capping or stacking.
We recommend starting with the packaging requirement: what load must the bottle withstand, in what condition, and with how much deformation? Then translate that requirement into a repeatable compression test. This gives your packaging and quality teams a shared basis for comparing trial bottles before releasing a new design.
Which Test Conditions Make Top Load Results Comparable?
To compare readings, control both the specimen and the test setup. Differences in readings may then be due to the test procedure rather than to the bottle design under test.
Define the Bottle State
Identify whether each bottle is empty or filled, capped or uncapped, and vented or sealed during compression. Trapped air can contribute to the measured resistance, so venting must be intentional and consistent. An uncapped bottle can still become sealed if the compression plate blocks its opening.
For filled samples, record the fill level, product or test liquid, closure condition, and internal pressure where relevant. Also specify conditioning temperature and time, plus the interval between blowing and testing. Keep different specimen conditions in separate result groups.
Control the Test Setup
Use same compression speed, platen setup, alignment, initial contact definition and end of test definition. Record force in Newtons and displacement in mm.
The test for PET bottle compression is typically conducted in a vented test fixture at a fixed test speed in order to measure the bottle’s buckling resistance. Details of the method and test settings must be stated in the test protocol and a number of end points could be agreed prior to the test. Whether a peak load test or force-at-displacement test is more suitable for acceptance testing is up to individual discretion.
What Do Top Load Results Tell You?
First review the individual results for each bottle, then compare the results from the different samples.
Read Force and Deformation Together
The force-displacement curve indicates how the resistance of a bottle changes while it is shortening. Record the force at the respective displacement and note the first buckling of the shoulder, sidewall or base.
Make sure the first buckling event is clearly distinguished from the largest force recorded later in the test. After the bottle has folded once, the subsequent compression may even rise to a higher value, which does not necessarily say anything about the ability of the bottle to still hold the required shape.
Take a picture of the deformed area and retain the curve of that area. Such information is far more valuable in later design comparison than the information contained in a spreadsheet of maximum force.
Compare Samples by Cavity
Identify the bottles by mold cavity and production interval. Report the number of samples tested, report the individual results. Report the minimum, average and spread of the results as opposed to reporting one mean for all the results.
A single cavity reading low on average needs to be investigated prior to acceptance of average value. Sampling of cavities and operational conditions to a release should include agreement on sample size and acceptance rule prior to test.
How Should You Set Bottle Top Load Acceptance Criteria?
The acceptance rule for a requirement can be built in three steps: 1) defining the requirement, 2) specifying the limits that are measurable, 3) testing these limits against realistic results.
Start with the Packaging Requirement
Axial load on the blowing and filling line, the completed pack and storage conditions to confirm with the packaging owner and equipment owner.
A brief single-bottle test does not tell you how a pallet will perform over the long term. All aspects of the package, i.e. bottle, closure, secondary packaging, stacking, temperature and time under load, have to be validated for PET bottle lightweighting while maintaining required performance. Compare like weights.
Write a Measurable Pass Rule
List the following: specimen condition, method revision, compression speed, end of displacement, minimum force, permissible deformation and sampling rule. Specify if force limit applies to all bottles tested or if another statistical criterion or parameter has been agreed upon. The average value alone does not ensure that all samples tested were above the limit.
Check a Worked Comparison
The following rule is illustrative: Minimum force of 150 N at 3 mm displacement, no buckling prior to 3 mm displacement, tested under identical conditions.
|
Trial Sample |
Force at 3 mm |
Buckling Before 3 mm? |
Sample Result |
|
A |
165 N |
No |
Pass |
|
B |
178 N |
Yes |
Fail |
Sample B records more force but fails on shape-retention. Treat the full agreed sample set by the same rule before deciding to release or not.
Which Bottle Design Details Should You Review?
Use the deformation record to distinguish between geometry related issues and material distribution related issues.
Match Buckling to Bottle Geometry
Locate the first buckling point on the bottle drawing. Examine the shoulder transition, panel depth, rib configuration and base contact of this area.
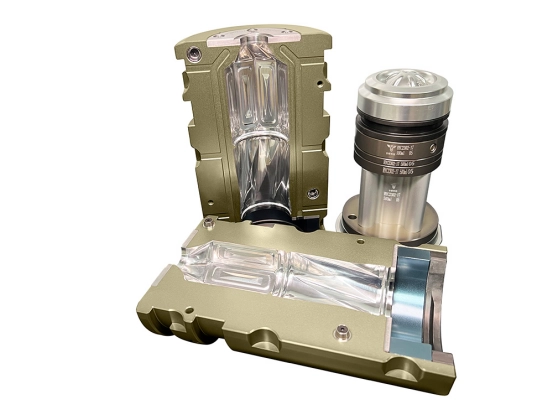
The bottle blowing mold defines these external features on the part. Test new revisions against a fixed test protocol – changes to the shoulder or a panel should be evaluated separately from changes to the acceptance criteria.
Compare Material Distribution
Measure and compare wall thickness at specific locations on the shoulder, main body and base of test pieces of different trial mold designs and in different cavities.
Equally weighted bottles do not guarantee equal wall distribution or compression performance. Verify preform geometry and the related stretch-blowing process as well as the bottle shape. Perform the agreed-upon qualification tests after any design changes.
Plan Your Bottle Design Review
Before approving your next bottle revision, gather the drawing, target weight, specimen conditions, compression curves, and photographs of deformation. At HEYAN TECHNOLOGY, you can discuss the bottle design with us to connect those findings with mold geometry and preform-to-bottle material distribution, giving the next trial a clear design question to answer.
FAQ
Should Top Load Be Reported in N or kg?
Use newtons, a force unit. Kilograms measure mass. If an instrument reports kilogram-force, label it kgf, not kg; 1 kgf is approximately 9.81 N. Convert readings before comparing reports from different instruments.
Can Different Bottle Sizes Share a Top Load Target?
The testing of small capacity containers can be done when required by packaging specification or test method. In such cases the target is not just the capacity of the container but also other factors such as bottle configuration, filling conditions and pack configuration, all of which need to be able to meet an acceptance criterion.
Does Passing Top Load Replace Drop or Pressure Testing?
No. Top load is a test of axial compression. Other critical loading conditions such as impact, internal pressure and seal are addressed by other critical checks that should be included in the qualification of product and distribution route.
Can You Reuse a Bottle After a Compression Test?
New samples must be used for independent qualification testing. A bottle that has been previously loaded may respond differently even if no apparent damage has occurred. Separate protocols must be established for repeated loading measurements and the loading history must be explicitly defined.