

Common Defects in Injection-Molded PET Caps and How to Troubleshoot Them

A cap defect is rarely just cosmetic. Light flash can jam a chute. A slightly oval thread can raise application torque or create a leak after filling. In a high-cavity tool, one unstable cavity can turn an acceptable run into a sorting problem.
PET cap molding needs a disciplined diagnosis because the part is small and the process window is not forgiving. Material condition, filling behavior, mold fit, cooling, and ejection all leave their own fingerprints. The useful question is not “which setting should be changed?” It is “what changed, and where is the evidence?”
Start with the Right Troubleshooting Process
Avoid changing melt temperature, injection pressure, and cooling time in the same trial. The result may look better, yet the cause stays hidden. Record the defect start time, affected cavities, resin lot, dryer readings, and recent mold or machine work.
A defect in every cavity usually points toward material or process conditions. The same defect in two nearby cavities often leads to local cooling, a vent, or a runner branch. That distinction saves hours. In one 32-cavity closure run, the apparent packing problem was low water flow through a circuit after a filter change.
Short Shots and Incomplete PET Cap Filling
Short shots are easy to identify when a thread is missing. They are less obvious when only the tamper-evident band is weak or the top bridge has a shallow fill. Inspect several parts under consistent light before deciding that a cavity is stable.
Typical symptoms
Missing thread detail, an incomplete band, thin areas near the gate, or a torn-looking cap edge are common signs. The cap may pass a visual check and fail only at the capping machine.
Likely causes
Low injection speed can let the flow front freeze before packing. Low melt temperature has a similar effect. A restricted gate, blocked vent, undersized shot, or uneven mold temperature can produce the same result. Wet PET also gives unstable flow and strength.
Troubleshooting actions
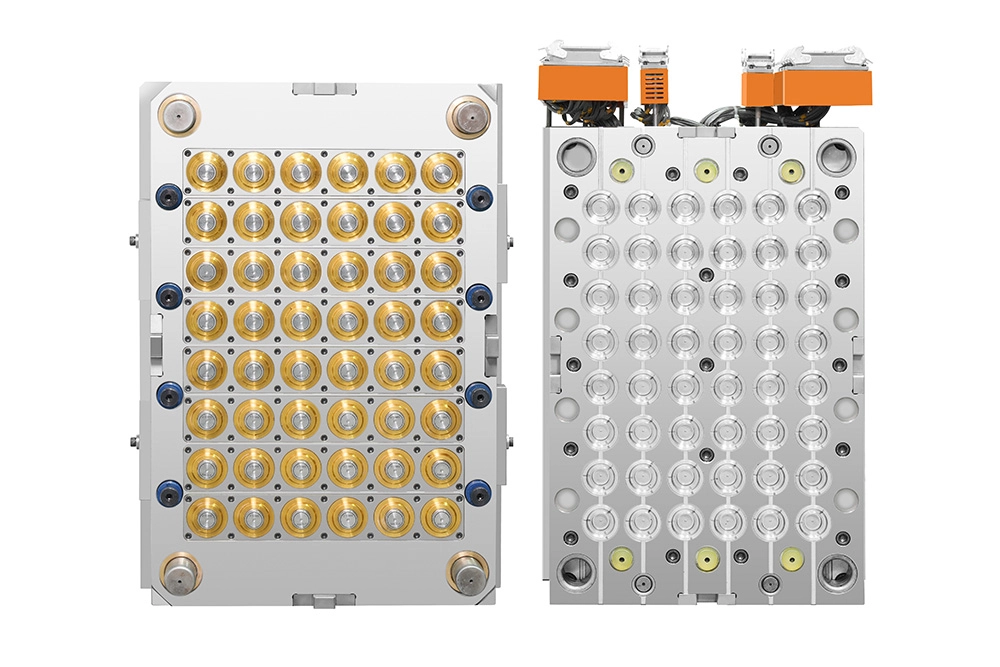
Confirm dryer operation and resin handling before touching the mold. Increase injection speed or pressure in small steps while watching cavity consistency. Check gates, runners, and end-of-fill vents. If selected cavities are short, compare their cooling temperatures and gate condition with good cavities. Review the cap mold and ring-lifting mold configuration when the pattern follows a fixed cavity group.
Flash Around the Parting Line, Threads, or Tamper Band
Flash can be a short process upset. Repeated flash at the same thread shut-off is usually a mold maintenance signal.
Typical symptoms
The excess material may appear as a thin feather at the parting line or a ridge around threads and tamper-band bridges. Even a fine ridge can interfere with torque testing and cap feeding.
Likely causes
High injection or holding pressure may force melt into a marginal shut-off. Excess melt temperature lowers viscosity. Insufficient clamp force, misalignment, damaged inserts, and worn parting faces are persistent causes. Flash after warm-up can indicate thermal movement at a shut-off.
Troubleshooting actions
Reduce pressure or melt temperature gradually and check the response. Verify actual clamp force. Inspect alignment, shut-offs, and thread-forming inserts under magnification. Do not polish a damaged surface blindly; its geometry controls sealing and thread engagement.
Sink Marks, Voids, and Uneven Wall Thickness
These defects point to an imbalance between filling, packing, and cooling. The cap may look acceptable at ejection, then reveal a depression on the conveyor.
Typical symptoms
Sink marks often occur near thicker transitions. Voids may emerge after sectioning. Uneven walls can make one side feel softer during compression testing.
Likely causes
Hold pressure may be too low, or hold time may end before gate freeze. Cooling can be weak around a core feature. Sometimes the part design asks too much of a thick section.
Troubleshooting actions
Establish gate-freeze time through a controlled hold-time study. Measure the same wall locations on good and bad caps. Check coolant flow and return temperatures by circuit. The principles in this cooling-channel design guide also apply: stable heat removal matters more than adding arbitrary seconds.
Warpage, Ovality, and Poor Cap Fit
Warpage is functional. A cap can pass dimensions after molding and still distort enough to sit unevenly on the bottle finish later.
Typical symptoms
Look for a cap that rocks on a flat gauge, an oval opening, thread mismatch, or inconsistent application torque. On a line, the first clue may be random cross-threading rather than an obvious visual defect.
Likely causes
Uneven cooling is common. Early ejection, residual stress, inconsistent shrinkage, and core-to-cavity misalignment also contribute. A worn core can generate a repeatable oval pattern cycle to cycle.
Troubleshooting actions
Compare inlet and outlet water temperatures. Increase cooling time only after verifying flow. Review packing, inspect core alignment, and test caps on the intended bottle neck. A bottle cap mold cannot be evaluated in isolation from the closure application.
Burn Marks, Black Specks, and Surface Discoloration
Dark marks are not always contamination. A burn mark at end of fill is often compressed air with nowhere to escape.
Typical symptoms
Burning tends to repeat in one location. Black specks may appear across cavities. Yellowing can develop as residence time increases.
Likely causes
Poor venting, excessive residence time, high barrel temperature, degraded material, and residue in the hopper or hot runner are familiar sources. A dead zone can release degraded material after a purge.
Troubleshooting actions
Clean the material path and inspect vents before increasing pressure. Confirm that barrel profile and residence time suit the resin. Check whether specks follow a cavity, batch, or machine restart.
Gate Vestige, Stringing, and Ejection Damage
Gate and ejection defects often appear when output targets rise and cycle time is tightened.
Typical symptoms
Gate vestige, strings, scratches, deformed threads, or a torn tamper band can create feeding problems even when the cap seals. Ejection damage often follows stripper or ejector movement.
Likely causes
Gate temperature may be too high. Ejection may start too early. Poor draft, vacuum, worn ejectors, and unstable hot-runner control can leave marks.
Troubleshooting actions
Check hot-runner stability, gate geometry, and ejection timing. Inspect moving components and confirm even release. Better cooling around a critical feature may solve the problem without sacrificing output.
Preventing PET Cap Defects Through Mold and Process Design
The most reliable correction happens before production pressure arrives. Cap geometry should match the resin and application. Gates need to fill delicate threads without a severe vestige. Cooling circuits need similar resistance and accessible maintenance points. Shut-offs need enough support to avoid drift.
Validate cavity dimensions, leak performance, application torque, and real bottle fit. A mold can make clean caps while causing downstream trouble. For projects combining tooling and equipment, an injection molding system complete line supporting program keeps mold output and handling in the same technical discussion.
Work with HEYAN TECHNOLOGY on PET Cap Molding Performance
Recurring cap defects deserve review before they become accepted loss. Bring the cap drawing, neck finish, resin grade, cavity map, samples, and recent process data.
HEYAN TECHNOLOGY provides cap molds alongside packaging mold and line-support options for PET container production. For a new closure project or an unstable tool, contact HEYAN TECHNOLOGY with the part requirements and operating issue. A clear defect record helps.
FAQ
Q: Why do PET caps show flash after a tool has run for several hours?
The mold may be expanding enough to weaken a shut-off, or melt temperature may be drifting. Compare flash with mold temperature and clamp-force data before changing inserts.
Q: Can low cooling water flow cause oval PET caps?
Yes. Uneven heat removal can leave different shrinkage around the circumference. Verify circuit flow and temperature balance, then confirm fit on the intended bottle.
Q: When is a cap defect a mold issue rather than a process issue?
Suspect the mold when the same cavity repeats the defect after material and process conditions are confirmed. Worn shut-offs, blocked cooling, gate damage, and alignment wear leave repeatable patterns.


